


Deck Building Project: Building Stairs For Decks
For most do-it-yourselfers building stairs is probably the most challenging part of building a deck. Accuracy is essential and it will involve using some mathematics.
Firstly, there are a set range of rise and run values for various types of stairs depending on the usage. Go to the building code page to learn more about the variances for stair risers and tread sizes.

Styles of Stairs

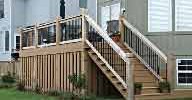
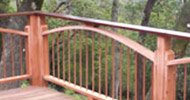
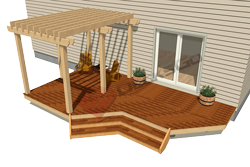
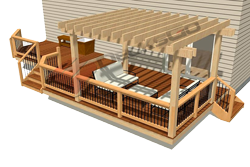
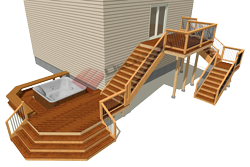
The stairs built for this deck used a solid stringer which gives it a very nice finished look as well as added strength because the stringer is so solid.
Since this method is slightly more advanced it's probably best we don't start here. Let's go right to the most common and basic way to build stairs which is with a notched stringer.
The Rule of Thumb for Decks
A seven to seven and three quarter inch rise is the right range for an outdoor deck. Tread size should fall within eight to twelve inches.
On commercial buildings and interior residential stairs the rise and runs can be significantly different. For your deck, and the one I built here, I used a seven inch rise and an eleven inch run which is looks great and very functional.
Stairs inside your house will generally have no more than a 7-3/4" inch rise to conform with the building code.
Rise and Run
 |
You must accurately determine the vertical drop from the finished surface of the deck to the exact location of the stairs landing point. The landing point is further away from the deck so it may not be the same level as directly below the deck. This must be taken into consideration. The diagram below illustrates the concept of rises and run nicely. |
This rise was a convenient 44”. This allowed for 6 rises of exactly 7.33” or about 7 ¼”. Using two 2x6s with a ¼” gap created a stair tread size of about 11 ¼”. To determine the total run we multiplied the run size of ten inches (not the actual tread because we wanted the treads to overhang slightly) by the number of rises (6x10=60). The total run was 60”.
Notched Stair Stringer Layout
   |
Take a carpenter’s square and mark the first rise and run by laying out the square so that the 7 ¼” and 10” points coincide with the edge of the stringer as in this picture.
Now extend the line of the tread all across the stringer as depicted in this picture. Finally, extend the line of the rise all the way down to the underside of the stringer as depicted in this picture. Now, continue measuring and tracing out each notch until you have completed six rises. To finish the stringer layout, extend the bottom line of the last run backwards to the bottom edge of the stringer. This will be the point of the stringer that contacts the landing. Cut out the waste with a circular saw. |
Rule of Thumb

The “throat” of the stringer should never be less than 3.5” or you will weaken the stringer.
Creating a Bull nose or Overhand for The Stair Tread

To create a bull nose or overhang for each tread, a tread size of 11 ½” was chosen and an 1 ½” overhang was used.
This will work out well for a 10 inch run. The picture below explains the concept of rise and run as well as the tread size and overhang.
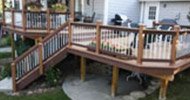
Building Deck Stairs with a Solid Stringer
  |
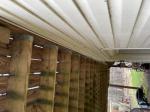
The same concept applies to determining the unit rise and runs for the stringers except the stringer is not cut. Instead, galvanized steel brackets are attached under the tread location and the treads are screwed on. To prolong the life of the stringer and the treads, leave a gap for water flow as shown in the picture. Another great tip for building stairs is to elevate the bottom of the contact point of the stringer from the landing to keep the stringer dry. |
Attaching Stair Stringers to the Deck
 |
This is the most common way to attach deck stairs to the deck. But this method of building stairs requires a solid connection and enough contact area on the deck perimeter to ensure a good hold. Metal brackets are recommended. |
In the case of this deck, we used a solid stair stringer and attached the stringer to the deck using galvanized angle brackets for a very secure attachment and reliable technique to building stairs.
You now have all the basics you will need to begin building stairs for your deck. So if you feel you are ready, let's keep going.

Home > Building A Deck > Building Stairs


Recent Articles
-
10x8 6 person spa deck
Jul 26, 22 12:17 PM
I think I might be over-engineering this but I live in CT and I'm also worried about snow weight. Adding a 8x10 deck attached to existing deck, 2x10's -
Hot tub weight
Jul 26, 22 12:16 PM
 I won an inflatable 6 person inter hot tub. I have a large deck. 12x 20 on both sides of the house. With a header to the house and the deck was built 6
 -
Deck around a swim spa
Jul 26, 22 12:15 PM
I'm putting a swim spa into an inground concrete bunker and will build a deck around it. I have been advised to keep the deck joists a minimum of 6 inches


It's time to start
making your memories.

How-To
Go Learn More
© 2004-2022 Decksgo.com. All Rights Reserved.